Showing posts with label Burbs-Home Improvements. Show all posts

Tuesday, April 1, 2014

Dining Room Make-over

After being in our house for a little over two years we decided to swap our dining and living rooms.  The living room was a larger space in the front of our house and we felt it was a better suited for hosting 8 people.


Above is a picture of our old dining room with a 5' table and 6 chairs.  


Here is a picture of the empty living room ready to be converted into a dining room!  


The picture above was a dining room from a house that was for sale right down the street from us, this was the inspiration behind our dining room make-over. With the end product in mind I started pinning (on Pinterest of course) to find a table, chairs, and chandelier that fit within my Handyman's strict budget, while my Handy man went to work on the painting and trim.
   

After many trips to the store and taking pretty much every gray paint sample available we finally agreed on a color.    


Up next was the wainscoting, this is where Kevin's engineering skills really come in handy.   


While Kevin was working on the wainscoting, I got busy finding the chairs I wanted. It didn't take long, the only problem was they were $289 a piece and way out of my budget for 8 of them. So off to craigslist I went...


I stumbled upon 8 of these chairs for only $26 a pop! Although I was very hesitant at first, I knew with a fresh coat of paint and some brand new fabric these little guys really had some potential.  


 First we stripped the fabric backs and seat cushions from the chair frame. 


Next came priming and painting. We selected Benjamin Moore Advance in Snow Bound for the frames.


For the new fabric we traveled to the fabric district in Philadelphia and found just what we were looking for at B Wilk Fabrics.   The ladies in there were so helpful!!  I highly recommend it for any fabric needs.   


After the old staples and fabric were pulled out lots of new ones put in...


We did the same fabric on the seat cushion and the front of the back cushion. 


For the back of the seat cushion we decided to go with a striped fabric for a little pop.  


The finished chairs, not bad for about $51 per chair...


We knew we wanted a long chandelier, and lucked out when this one popped up at Joss and Main within budget! :)   


We also found this beautiful 8' wood table on Craigslist for only $200 and Kevin painted the legs to match the chairs.  


We are still looking to get a rug, buffet and some other accent pieces but for now our dining room is complete. 


The final 8 chairs...


A close up of the finished trim.


And now we are officially ready to host a dinner party!


My newest obsession is Rodan + Fields skin products.   Check out all their wonderful products here.  

Redfine Regimen has been my favorite so far!  Talk about some serious before and after pictures!  


Sunday, March 3, 2013

Foyer- Before and After

The foyer is complete!


Now that you have seen the before and after pictures, here is a little bit more about how my handyman did it:


He demolished the hall closet that took up a lot of our foyer space when you first walked in the front door. 


After that, he tore up the slate floor and all the reinforcing underneath it.


After putting down an extra layer of 1/2" plywood subfloor and 1/4" Hardibacker, installation of the new travertine tile began.


Once the tile  and base molding was installed it was my turn to begin decorating, starting with the table from my previous post.


The picture rod is from Rodworks. They have a number of different designs and sizes and they are all relatively inexpensive. The distressed frames and the C are from the French Flea shop on Esty
The Moroccan rug is from RugsUSA and the globe light is from Pottery Barn.


Saturday, March 2, 2013

My Getting Ready Room....No Boys Allowed!

Kevin and I share just about everything after almost 3 years of marriage, but sharing our closets is something we aren't quite ready to do.  :)    Until there is no longer a closest available in our house for both of us, we most likely continue to have two separate closets.  Which leads me to my next post.   I recommend every girl having their very own getting room.   This way I am able to still decorate with my girly colors and have a place to spread out my dresses while staying out of my husband's space.  (It's a win/win!)

My getting ready room is still a work in progress but here is where it stands today....

You may remember this desk from an earlier blog, this is a desk that my handyman turned into a vanity.  


 My in-laws bought me the Young House Love book for my birthday.  (which is great, by the way)  I quickly found my first project.
  

I first measured the top of my vanity, and then bought fabric and plexiglass matching those measurements.   Then either you or (your wonderful mother-in-law) hems the edge of the fabric, and that is it!    Little did my mother-in-law know, that not only did she buy me the book, but then I was going to ask her to help me with one of the projects!  Maybe I will learn to sew, someday...thank you MK!

This shelf took some time to find, but this is a product of some patient Homegoods shopping.  I had in my mind what I wanted for months.  I knew I wanted a shelf to put up pictures of Emma Claire, and also a place to hang my necklaces.  My handyman offered to make me one, but after you buy all the materials I think it was cheaper to buy the $24 shelf from Homegoods.  


Thank you Flair Accessories for the cute blue necklace! 

Like I said my getting ready room is still a work in progress.  I hope to have more updates sooner rather then later!  

Here are few other ideas for jewelry organizers just in case you are in the market!


Monday, January 21, 2013

Hallway Table Makeover


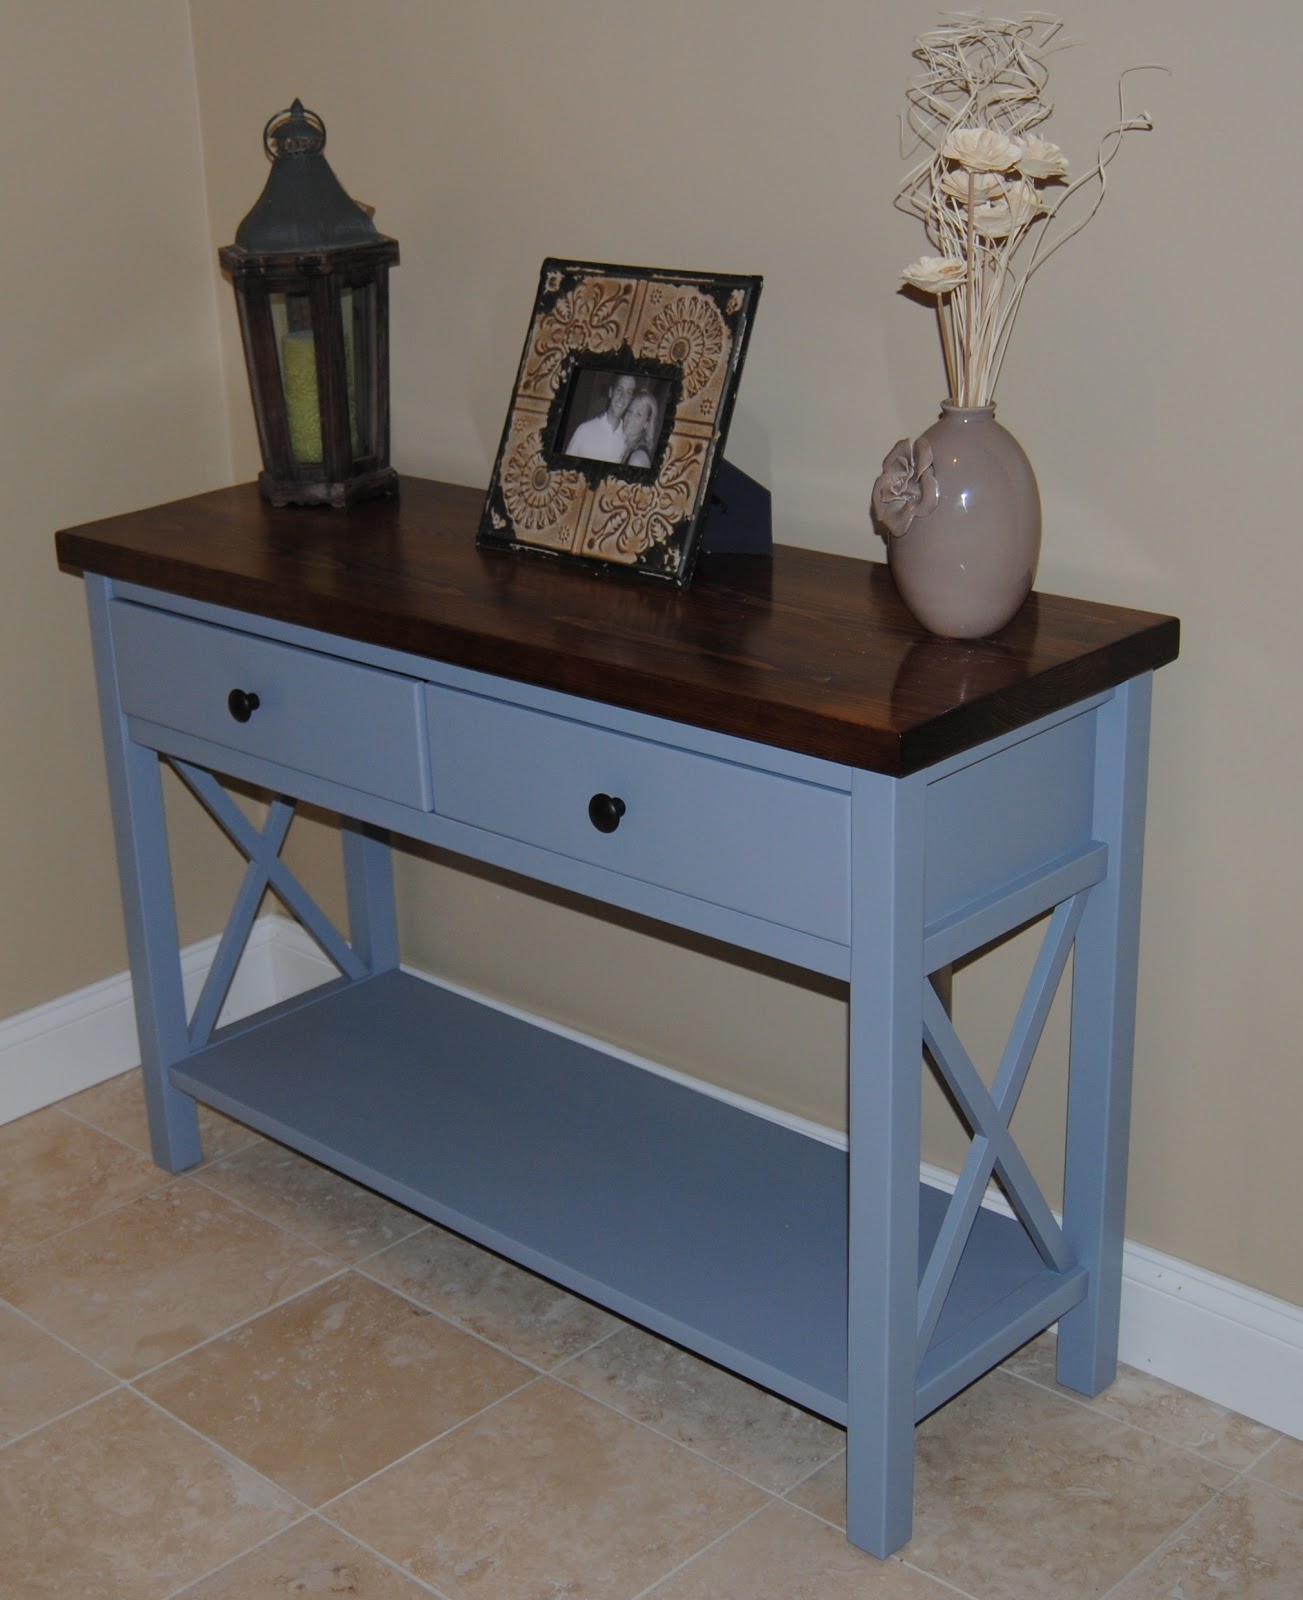
Kevin and I had a bought a table similar to the one below for our city house.   We brought this table to the burbs, but decided we would we either sell it or paint it.  After doing a lot of research for a new table, we decided a table make-over was what were were going to do.


Kevin first sanded and primed the table to get it ready to be painted blue. 
 

For the top he bought two 2x8 boards from Home Depot.  After cutting them to right length he glued them together using wood glue and clamped them overnight before cutting them to the final size.   


After sanding the wood down, he stained it with 3 coats of Minwax.

And like that our empty hallway has been filled up! 


Thursday, December 6, 2012

A little beadboard in the bathroom

I wish I could say I helped with this one, but I headed to NY last weekend for a little girls trip and boy did my handy man do some work on our downstairs bathroom

Before...
Saturday Kevin took out the toilet and sink and started his painting. 


 After painting he added the beadboard that he had bought from Home Depot and then threw on a coat of white paint. 


All finished!!  This is what it looked like when I got home!  Man he is good! 


And for the finished product!!      
Great job Handyman! 


And us girls enjoying NY while Kev was home working hard! What a guy!