Monday, January 21, 2013

Hallway Table Makeover


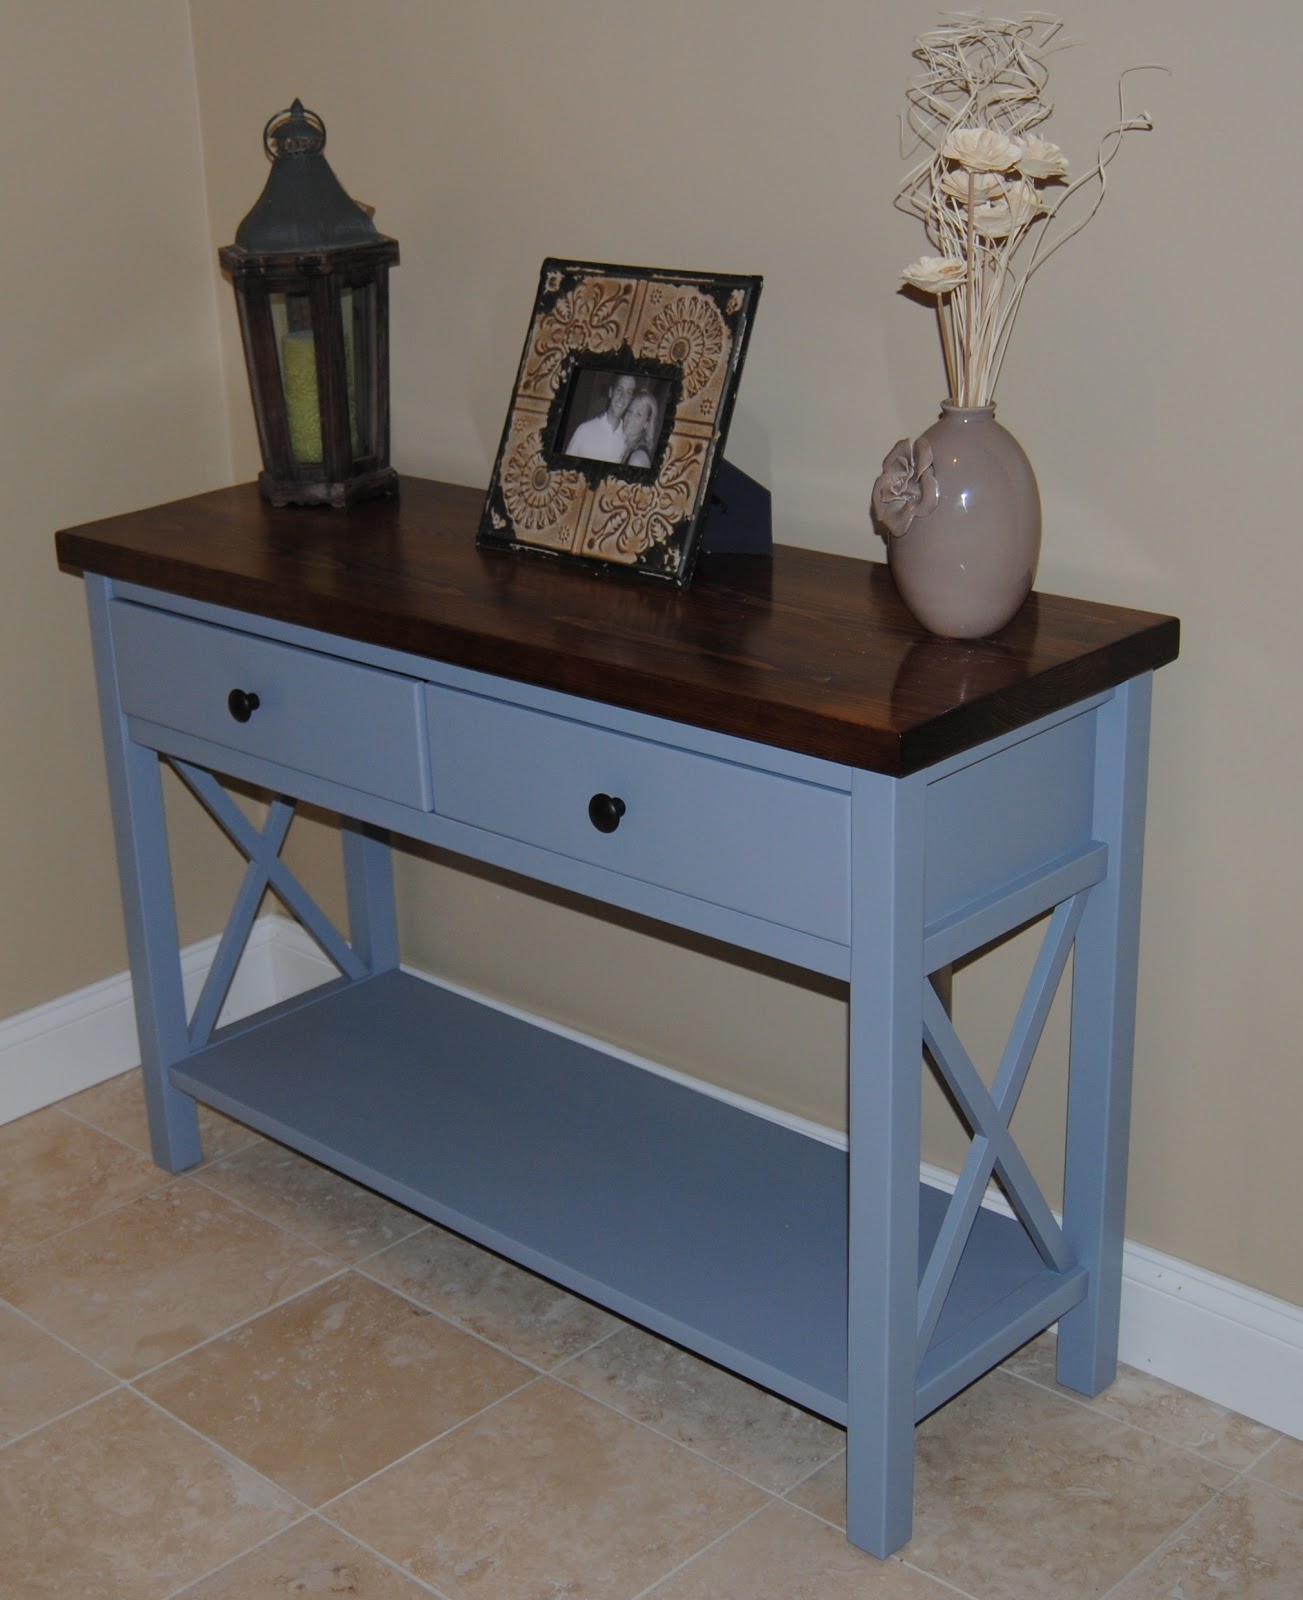
Kevin and I had a bought a table similar to the one below for our city house.   We brought this table to the burbs, but decided we would we either sell it or paint it.  After doing a lot of research for a new table, we decided a table make-over was what were were going to do.


Kevin first sanded and primed the table to get it ready to be painted blue. 
 

For the top he bought two 2x8 boards from Home Depot.  After cutting them to right length he glued them together using wood glue and clamped them overnight before cutting them to the final size.   


After sanding the wood down, he stained it with 3 coats of Minwax.

And like that our empty hallway has been filled up! 


Sunday, December 9, 2012

My best friend's getting married!!!

From the moment I wake up, before I say I put on make up.  I say a little prayer for you... 

I was a little late but a couple weeks ago we had little get together for my best friend Greta and her fiance Patrick.  


                                     Cheers you two cuties!  Can't wait for Jamaica in June! 


Bachelorette Party Coming Soon!! 


Thursday, December 6, 2012

A little beadboard in the bathroom

I wish I could say I helped with this one, but I headed to NY last weekend for a little girls trip and boy did my handy man do some work on our downstairs bathroom

Before...
Saturday Kevin took out the toilet and sink and started his painting. 


 After painting he added the beadboard that he had bought from Home Depot and then threw on a coat of white paint. 


All finished!!  This is what it looked like when I got home!  Man he is good! 


And for the finished product!!      
Great job Handyman! 


And us girls enjoying NY while Kev was home working hard! What a guy!   


Sunday, November 18, 2012

DIY- JOY


My handy dandy sister-in-law sent me this one and it was just too cute not to copy.   After about 15 texts asking her exactly what she did I figured it out and thought I would share.  


So everything can be bought at Michael's.   

I started with O.   First step is to fill the plain glass ornament with the glittery red balls, and then tie a ribbon to the top.   I then gorilla glued the ornament to a piece of glitter foam, you can use wood, or pretty much anything flat to keep the ornament standing.  


Step two:   Buy the white wooden letters in a J and Y and scrapbook paper.  I used green and white polka dots but you can use whatever paper you like.   Trace the letters and cut them out to placed on top of the letters.


Next paint the side of the letters to match whatever scrape book paper you buy.  

 Lastly use Martha Stewart's decoupage glue and sealer to glue the paper to the wood and then put another coat on top to seal it.  

Thanks again Sarah for this great idea!   

Happy Holidays!  


Monday, October 22, 2012

Painted TV Stand

Over the last few months we have been keeping our eyes open for a new TV stand. As usual, I have found  a few I really liked at Pottery Barn, the only issue is they were way out of our price range.  Eventually we found this gem on Craigslist for only $75.  

We took off the doors and hinges and then primed the whole thing.


 We had many discussions about what color to paint it, but with the help of my family friend, Mrs. Petersen, we used this Pottery Barn desk as our inspiration.  The color we chose was Benjamin Moore Affinity - Coastline AF-570.


After adding the second coat of paint and some new hardware...wallah!


Before/After 


Monday, October 8, 2012

Oreo Cookie Pie

1 pkg. Oreo cookies
1 c. butter, unsalted
1 c. powdered sugar
8 oz. softened cream cheese
24 oz. Cool Whip (2, 12 oz. pkg.) defrost for recipe
2 sm. (3 oz.) boxes instant chocolate fudge pudding or instant reg. chocolate pudding
2 c. milk
 
Crush Oreo cookies. Put small amount of crumbs aside (2-3 tablespoons). Melt butter and mix with remainder of crumbs. Spread on bottom of 13 x 9 x 2 inch glass pan, packing lightly to form crust.


 Combine soften cream cheese, 12 ounces Cool Whip and sugar. Mix until spreading consistency. Spread over crust.


Combine pudding mix with 2 cups milk. Do not let pudding become too thick. Spread over last layer.
 

Sprinkle with reserved cookie crumbs.


Refrigerate to store. Serves 15. And ENJOY! 

Sunday, September 30, 2012

Here comes Fall

 Fall Decorating around the Camponeschi house has begun...

You probably recognize these from earlier this year.   Here they are re-purposed.   Clearly Kev likes the reeses.  


Our kitchen table 


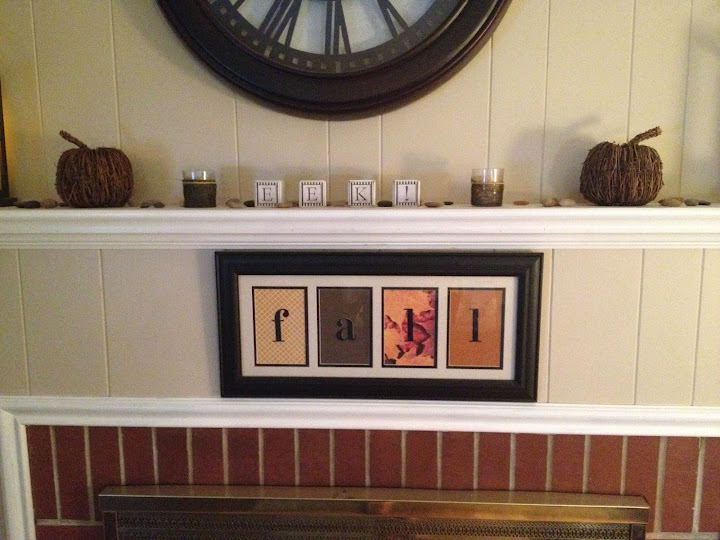
The Mantle from a far:


Closer...


The Fall Sign was something I made from a trip to Michaels.   You just need the frame, scrape book paper, letters (from the scrape book isle) and you are all set. 

Above is the scrap book paper I started with...just cut it to fit the open frames and tape the paper to the mount of the frame.  Once you have everything tape to the white mount.  You add the letters.  Once that is complete, flip the frame over and enjoy!


Mumpkins for the front porch.


Take the top off the pumpkin and empty it out.   Fill it with pot soil, or leave the mum in the original pot and place the whole pot in the pumpkin.  My mum was too big so I need to remove it from the original pot.


I bought the bows at Michael's and added them at the end. 


More decorations to come.